 UPDATE 10 Ago 2010: Correction of some aspects of compiling and creating startup scripts runlevels and some errors.
UPDATE 12 Ago 2010: Added note to the final error NDOUTILS, has been corrected from NDOUTILS to use TCP socket correctly.
Updating the configuration file import.
Let's see how you install Nagios monitoring tool and Centreon graphical configuration tool for Nagios management is something simple.
Nagios allows you to monitor any computer connected to the network (GNULinux, MS Windows, routers, etc.) and send alerts when a problem happens (equipment falls, rebase of storage limits…)
We will use a virtual machine with VirtualBox 3.2.6. We start from a ubuntu server installation 10.04 LTS 64 openssh server basic bits and backports repositories partners and commented out. We have also installed vim and wget and we have completely updated to day 9 August 2010, which implies the kernel 2.6.32-24.39. The server IP is 192.168.1.10 and we call ubults6400.
Packages to install for Nagios 3.2.1
To install Nagios 3 download the latest stable version, nagios plugins and ndoutils. If only we would nagios, without Centreon, it would be best to install the nagios version that comes with the distribution (3.2.0) apt because it comes with integrated, but, how are we going to use centreon, the compiled and installed from the packages to use the standard nagios directory.
fjbejarano@ubults6400:~$ pwd
/home/fjbejarano
fjbejarano@ubults6400:~$ mkdir nagiossrc
fjbejarano@ubults6400:~$ cd nagiossrc/
fjbejarano@ubults6400:~/nagiossrc$ wget http://prdownloads.sourceforge.net/sourceforge/nagios/nagios-3.2.1.tar.gz
fjbejarano@ubults6400:~/nagiossrc$ wget http://sourceforge.net/projects/nagiosplug/files/nagiosplug/1.4.15/nagios-plugins-1.4.15.tar.gz/download
fjbejarano@ubults6400:~/nagiossrc$ wget http://prdownloads.sourceforge.net/sourceforge/nagios/ndoutils-1.4b9.tar.gz
Install required packages for Nagios 3
$ sudo aptitude install apache2 bsd-mailx fancontrol gawk libapr1 libaprutil1 libaprutil1-dbd-sqlite3 libaprutil1-ldap libgd2-noxpm libjpeg62 libmysqlclient16 libnet-snmp-perl libperl5.10 libpq5 libradius1 libsensors4 libsnmp-base libsnmp15 libtalloc2 libwbclient0 lm-sensors postfix radiusclient1 samba-common libgd2-xpm-dev build-essential gcc-multilib libapache2-mod-php5 mysql-server mysql-client libmysqlclient-dev dnsutils fping libssl-dev libldap2-dev libpq-dev
This will install many dependencies and apache2 server, mysql, postfix and others.
We introduce the mysql root user password when requested.
In postfix, choose website at the request. I have left the postfix default domain (or configure it to our taste).
We create a nagios user and group.
$ sudo groupadd nagios
$ sudo groupadd nagcmd
$ sudo useradd -m -s /bin/bash -c "User for Nagios" -g nagios -G nagios,Nagios nagcmd
$ sudo passwd nagios
Introduzca la nueva contraseña de UNIX:
Retype new UNIX password:
passwd: password updated successfully
$ sudo usermod -a -G nagcmd www-data
Nagcmd group is for external commands can be added through the web interface. Add the nagios user and the user apache2 (www-data) group.
Unzip, compiled and installed Nagios 3.2.1
$ pwd
/home/fjbejarano/nagiossrc
$ tar -xzf nagios-3.2.1.tar.gz
$ cd nagios-3.2.1 /
$ sudo ./configure --prefix=/usr/local/nagios --with-command-group=nagcmd --enable-nanosleep --enable-event-broker

...
Creating sample config files in sample-config/ ...

*** Configuration summary for nagios 3.2.1 03-09-2010 ***:

 General Options:
 -------------------------
        Nagios executable:  nagios
        Nagios user/group:  Nagios,nagios
       Command user/group:  Nagios,nagcmd
            Embedded Perl:  no
             Event Broker:  yes
        Install ${prefix}:  /usr/local/nagios
                Lock file:  ${prefix}/var/nagios.lock
   Check result directory:  ${prefix}/var/spool/checkresults
           Init directory:  /etc/init.d
  Apache conf.d directory:  /etc/apache2/conf.d
             Mail program:  /usr/bin/mail
                  Host OS:  linux-gnu

 Web Interface Options:
 ------------------------
                 HTML URL:  http://localhost/nagios/
                  CGI URL:  http://localhost/nagios/cgi-bin/
 Traceroute (used by WAP):

Review the options above for accuracy.  If they look okay, type 'make all' to compile the main program and CGIs.
As we see, nagios is installed in / usr / local / nagios and have the configuration files, and other plugins in this directory and subdirectories. We will use them in Centreon. As is bold, if all went well, compile and install. We also see Event Broker is enabled, this is necessary for the subsequent installation of ndoutils.
$ sudo make all
...
*** Compile finished ***

If the main program and CGIs compiled without any errors, you
can continue with installing Nagios as follows (type 'make'
without any arguments for a list of all possible options):

  make install
     - This installs the main program, CGIs, and HTML files

  make install-init
     - This installs the init script in /etc/init.d

  make install-commandmode
     - This installs and configures permissions on the
       directory for holding the external command file

  make install-config
     - This installs *SAMPLE* config files in /usr/local/nagios/etc
       You'll have to modify these sample files before you can
       use Nagios.  Read the HTML documentation for more info
       on doing this.  Pay particular attention to the docs on
       object configuration files, as they determine what/how
       things get monitored!

  make install-webconf
     - This installs the Apache config file for the Nagios
       web interface

$ sudo make install && sudo make install-init && sudo make install-commandmode && sudo make install-config && sudo make install-webconf
With this we have installed the binaries and configuration files for nagios.
Create user “nagiosadmin” that is the one that will access the web interface of nagios. For them we use the htpasswd utility to create a file (-c) nagios user for apache. This file we created with that name and in that route because it is the name and the default route that uses the file / etc/apache2/conf.d/nagios.conf to find users. Restart apache2. And add the startup script for nagios to runlevels and modify / usr / local / nagios / etc / mail contatcs.cfg and we put where we want to send alerts (bold line). We permissions.
$ sudo htpasswd -c /usr/local/nagios/etc/htpasswd.users nagiosadmin New password: Re-type new password: Adding password for user nagiosadmin $ sudo service apache2 restart $ sudo update-rc.d nagios defaults update-rc.d: warning: /etc/init.d/nagios missing LSB information update-rc.d: see Adding system startup for /etc/init.d/nagios ... /etc/rc0.d/K20nagios -> ../init.d/nagios /etc/rc1.d/K20nagios -> ../init.d/nagios /etc/rc6.d/K20nagios -> ../init.d/nagios /etc/rc2.d/S20nagios -> ../init.d/nagios /etc/rc3.d/S20nagios -> ../init.d/nagios /etc/rc4.d/S20nagios -> ../init.d/nagios /etc/rc5.d/S20nagios -> ../init.d / nagios $ sudo vim / usr / local / nagios / etc / objects / contacts.cfg # Just one contact defined by default - the Nagios admin (that's you) # This contact definition inherits a lot of default values from the 'generic-contact' # template which is defined elsewhere. define contact{ CONTACT_NAME nagiosadmin ; Short name of user use generic-contact ; Inherit default values from generic-contact template (defined above) alias Nagios Admin ; Full name of user email fjbejarano@localhost ; <<***** CHANGE THIS TO YOUR EMAIL ADDRESS ****** }
Installing Nagios plugins
Compile and install nagios plugins
$ CD ..
fjbejarano@ubults6400:~/nagiossrc$ tar -xzf nagios-plugins-1.4.15.tar.gz
fjbejarano@ubults6400:~/nagiossrc$ cd nagios-plugins-1.4.15/
$ sudo ./configure --with-nagios-user=nagios --with-nagios-group=nagios --with-openssl=/usr/bin/openssl --enable-perl-modules
...
config.status: creating po/Makefile
            --with-apt-get-command: /usr/bin/apt-get
              --with-ping6-command: /bin/ping6 -n -U -w %d -c %d %s
               --with-ping-command: /bin/ping -n -U -w %d -c %d %s
                       --with-ipv6: yes
                      --with-mysql: /usr/bin/mysql_config
                    --with-openssl: yes
                     --with-gnutls: no
               --enable-extra-opts: no
                       --with-perl: /usr/bin/perl
             --enable-perl-modules: yes
                     --with-cgiurl: /nagios/cgi-bin
               --with-trusted-path: /am:/sbin:/usr / bin:/usr/sbin
                   --enable-libtap: on

$ sudo make && sudo make install
Install plugins in / usr / local / nagios / libexec.
Installing the broker and daemon NDOutils
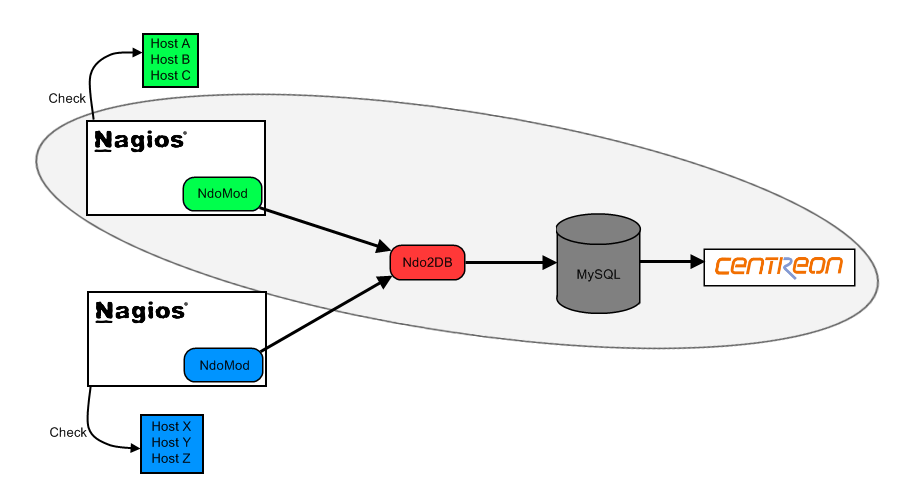
Last, ndoutils used to install the nagios data are stored in a database mysql. The broker ndomod takes data from nagios and passes the ndo2db daemon that inserts into mysql database. We have several satellites with Nagios as ndomod.oy only to send the data to a central database installed with daemon ndo2db (but that's another story, Here we have everything on the same computer)
First configure and compile the files.
$ CD ..
fjbejarano@ubults6400:~/nagiossrc$ tar -xzf ndoutils-1.4b9.tar.gz
fjbejarano@ubults6400:~/nagiossrc$ cd ndoutils-1.4b9/
$ sudo ./configure
$ sudo make
Create the database called nagios and installdb ndoutils script tables are created. This database will be included in the daemon configuration file ndo2db so you know where to send data from nagios. The daemon listens on port ndo2db 5668.
$ mysql-u root-p-e "create database nagios"
$ mysql-u root-p-e "grant select,update,insert,delete on nagios.* to 'nagios'@'localhost' identified by 'password'"
fjbejarano@ubults6400:~/nagiossrc/ndoutils-1.4b9$ cd db
$ sudo ./installdb -u root -p password -h localhost -d nagios
DBD::mysql::db do failed: Table 'nagios.nagios_dbversion' doesn't exist at ./installdb line 51.
** Creating tables for version 1.4b9
     Using mysql.sql for installation...
** Updating table nagios_dbversion
Done!
With the above make command has created several files in ~ / nagiossrc/ndoutils-1.4b9/src, ndomod ndo2db-3x-3x.oy. Copy and rename the files to the / usr / local / nagios / bin for use nagios. Also copy the configuration files of the two files to the Nagios etc. We permit and add it to start.
$ CD ..
$ sudo cp src/ndomod-3x.o /usr/local/nagios/bin/ndomod.o
$ sudo cp src/ndo2db-3x /usr/local/nagios/bin/ndo2db
$ sudo cp config/ndomod.cfg-sample /usr/local/nagios/etc/ndomod.cfg
$ sudo cp config/ndo2db.cfg-sample /usr/local/nagios/etc/ndo2db.cfg
$ sudo chmod 774 /usr/local/nagios/bin/ndo*
$ sudo chown nagios:nagios / usr / local / nagios / bin / ndo *
$ sudo cp daemon-init /etc/init.d/ndo2db
$ sudo chmod u x /etc/init.d/ndo2db
$ sudo update-rc.d ndo2db defaults
Finally we have to make some changes in the nagios configuration file and those of ndo2db and ndomod.o
In the file ndo2db.cfg TCP socket to put the comment lines and related to the unix socket. Also fill in the data to the MySQL database we created earlier (name, user, etc.)
$ sudo vim / usr/local/nagios/etc/ndo2db.cfg

# SOCKET TYPE
# This option determines what type of socket the daemon will create
# an accept connections from.
# Value:
#   unix = Unix domain socket (default)
#   tcp  = TCP socket

#socket_type=unix
socket_type=tcp

# SOCKET NAME
# This option determines the name and path of the UNIX domain
# socket that the daemon will create and accept connections from.
# This option is only valid if the socket type specified above
# is "Unix".

#socket_name=/usr/local/nagios/var/ndo.sock

...

# DATABASE NAME
# This option specifies the name of the database that should be used.

db_name=nagios

# DATABASE TABLE PREFIX
# Determines the prefix (if any) that should be prepended to table names.
# If you modify the table prefix, you'll need to modify the SQL script for
# creating the database!

db_prefix=nagios_

# DATABASE USERNAME/PASSWORD
# This is the username/password that will be used to authenticate to the DB.
# The user needs at least SELECT, INSERT, UPDATE, and DELETE privileges on
# the database.

db_user=nagios
db_pass=password
In ndomod.cfg also have to modify the data to match the tcp socket. You have to put the ip where the daemon ndo2db, in this case is the same where ndomod.o, localhost (127.0.0.1), But if we had other Centreon nagios satellites would have to put the ip of the computer where the data is collecting ndo2db.
We can also configure the output_buffer_items. By default, if there is a connection failure, the buffer stores 5000 records data bases that had put her en (flush) is restored when. All records that pass that number are lost. I have spent time with ndoutils failing to do enough connection and so I've changed 20000. Put it as ye see you.
$ sudo vim / usr / local / nagios / etc / ndomod.cfg

# OUTPUT TYPE
# This option determines what type of output sink the NDO NEB module
# should use for data output.  Valid options include:
#   file       = standard text file
#   tcpsocket  = TCP socket
#   unixsocket = UNIX domain socket (default)

#output_type=file
output_type=tcpsocket
#output_type=unixsocket

# OUTPUT
# This option determines the name and path of the file or UNIX domain
# socket to which output will be sent if the output type option specified
# above is "file" or "unixsocket", respectively.  If the output type
# option is "tcpsocket", this option is used to specify the IP address
# of fully qualified domain name of the host that the module should
# connect to for sending output.

#output=/usr/local/nagios/var/ndo.dat
output=127.0.0.1
#output=/usr/local/nagios/var/ndo.sock

...

# OUTPUT BUFFER
# This option determines the size of the output buffer, which will help
# prevent data from getting lost if there is a temporary disconnect from
# the data sink.  The number of items specified here is the number of
# lines (each of variable size) of output that will be buffered.

output_buffer_items=20000
On the other hand, you can encrypt SSL connections if both configuration files the directive activais use_ssl to 1. But only worth using tcpsocket, obviously.
In section nagios.cfg Event Broker Module, nagios tell you where the broker that we use. In the section Option Event Broker (slightly higher), we ensure that a -1 the broker to collect data, unless, will not.
$ sudo vim / usr / local / nagios / etc / nagios.cfg

# EVENT BROKER OPTIONS
# Controls what (if any) data gets sent to the event broker.
# Values:  0      = Broker nothing
#         -1      = Broker everything
#          = See documentation

event_broker_options=-1

# EVENT BROKER MODULE(S)
...
# Example:
#
#   broker_module= [moduleargs]

broker_module=/usr/local/nagios/bin/ndomod.o config_file=/usr/local/nagios/etc/ndomod.cfg
#broker_module=/somewhere/module1.o
Finally start the daemon and start nagios
$ sudo service ndo2db start
$ sudo service nagios start
Check installation of Nagios
To check that everything went well, just put in a browser the following URL
http://192.168.1.10/Nagios /
and put the user “nagiosadmin” and password you put in the installation. With this we should see the following screen.

From now, could configure the devices to be monitored through the configuration files and then view Nagios own equipment and, Alerts, etc, Web interface we see in the image, but for the simplest configuration we will use Centreon.
Installing Centreon: Part Console
Centreon is a tool that enables us to configure and manage Nagios. This, and because it does not come with the distribution, must download and install it manually.
First we will install the console and install the packages needed to use.
$ sudo aptitude install php5 php5-mysql php-pear php5-ldap php5-snmp php5-gd rrdtool librrds-perl libconfig-inifiles-perl libcrypt-des-perl libdigest-hmac-perl libdigest-sha1-perl libgd-gd2-perl snmp snmpd libnet-snmp-perl libsnmp-perl libgd2-xpm libgd2-xpm-dev libpng12-dev
Enable the following in / etc / default / snmpd for the automatic start snmpd and snmpdtrap
$ sudo vim /etc/default/snmpd

# snmptrapd control (yes means start daemon).  As of net-snmp version
# 5.0, master agentx support must be enabled in snmpd before snmptrapd
# can be run.  See snmpd.conf(5) for how to do this.
TRAPDRUN=yes
And as we see in the comments we enable AgentX in / etc / snmp / snmpd.conf. It is by the end of file. Uncomment the line in bold.
$ sudo vim /etc/snmp/snmpd.conf

###############################################################################
# Subagent control
#

# The agent can support subagents using a number of extension mechanisms.
# From the 4.2.1 release, AgentX support is being compiled in by default.
# To use this mechanism, simply uncomment the following directive.
#
master agentx
#
#   Please see the file README.agentx for more details.
#
With this we have installed units Centreon.
Download the tool Centreon. In this case the stable 2.1.9. Currently there are no language-pack in Spanish so I will leave it in English. Other languages like German, French or Portuguese.
fjbejarano@ubults6400:~$ pwd
/home/fjbejarano
fjbejarano@ubults6400:~$ mkdir centreon-inst
fjbejarano@ubults6400:~$ cd centreon-inst/
fjbejarano@ubults6400:~ / $ Wget-inst centreon http://download.centreon.com/index.php?id=143
fjbejarano@ubults6400:~/centreon-inst$ tar -zxf centreon-2.1.9.tar.gz
fjbejarano@ubults6400:~/centreon-inst$ cd centreon-2.1.9/
fjbejarano@ubults6400:~/centreon-inst/centreon-2.1.9$ ls
bin        cron  fileslist.txt  header.txt  install.sh  libinstall  log      README     snmptt  varinstall
CHANGELOG  doc   GPL_LIB        INSTALL     lib         LICENSE     plugins  snmptrapd  tmpl    www
Once Centreon-2.1.9 directory run the install.sh file to see options.
$ ./install.sh
Usage: ./install.sh -f
  -i    install centreon
  -f    file with all variable
  -u    upgrade centreon with specify your directory with instCent* files
  -v    verbose mode
The option that interests us is-i to install Centreon, but we can upgrade if you already have installed, read INSTALL and README directory. It was executed with root permissions.
$sudo ./install.sh -i
We warn you that we are sure you have installed sudo, thirst, php, apache, rrdtool and mysql and verify that there are binaries you need as find, chmod, etc. In our case all ok.
We give enter, read the license and click “and” to accept.
Now we will ask you to install. Press “and” a Centreon Web Front, Centreon CentCore, Centreon Nagios Plugins, Centreon Snmp Traps process.
CentWeb starts installing and asks the board of Centreon. We default that gives us, /usr/local/centreon. The default log directory to [/usr/local/centreon/log], the default configuration to [/etc / Centreon], generación de archivos default to [/usr/local/centreon], etc. We all create it.
When we ask where is the file RRDs.pm, in another terminal run the following command.
$ sudo find / -name "RRDs.pm"
/usr/lib/perl5/RRDs.pm
In our case is in place that indicates the default so press enter, but if somewhere else would have put the correct path.
Do the same with PEAR.php
$ sudo find / -name "PEAR.php"
/usr/share/php/PEAR.php
and is right by default.
Now, have to go telling the directories where you installed Nagios. They are putting default, So hit “and” until we ask for the broker module ndoutils. Then you have to tell where, it was copied before:
Where is your NDO ndomod binary ?
default to [/usr / sbin / ndomod.o]
> /usr/local/nagios/bin/ndomod.o
/usr/local/nagios/bin/ndomod.o                             OK
We set up everything “and” and leave the defaults in sudo and apache.
We will show that we have installed pear modules and we need to install. We say that if “and” to install / update needed.
------------------------------------------------------------------------
Pear Modules
------------------------------------------------------------------------
Check PEAR modules
PEAR                            1.4.9       1.9.0          OK
DB                              1.7.6                      NOK
DB_DataObject                   1.8.4                      NOK
DB_DataObject_FormBuilder       1.0.0RC4                   NOK
MDB2                            2.0.0                      NOK
Date                            1.4.6                      NOK
HTML_Common                     1.2.2                      NOK
HTML_QuickForm                  3.2.5                      NOK
HTML_QuickForm_advmultiselect   1.1.0                      NOK
HTML_Table                      1.6.1                      NOK
Archive_Tar                     1.1         1.3.3          OK
Auth_SASL                       1.0.1                      NOK
Console_Getopt                  1.2         1.2.3          OK
Net_SMTP                        1.2.8                      NOK
Net_Socket                      1.0.1                      NOK
Net_Traceroute                  0.21                       NOK
Net_Ping                        2.4.1                      NOK
Validate                        0.6.2                      NOK
XML_RPC                         1.4.5                      NOK
SOAP                            0.10.1                     NOK
Log                             1.9.11                     NOK

Do you want me to install/upgrade your PEAR modules
[y / n], default to [and]:
> y
Upgrading PEAR modules
Everything else we respond to “and” y aceptamos las rutas por defecto. Care to give to enter without paying “and” as the default option is not “n”.
Installation Centreon: Web Part
Completing the Web interface Centreon. We connect with a browser to http://localhost / http centreon://192.168.1.10/centreon
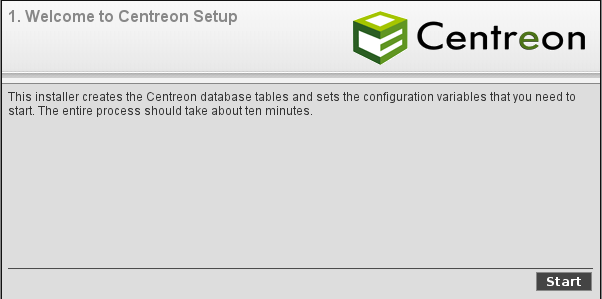
We welcome screen comes out and tells us that we will configure the database and the necessary configuration variables. Indicates that take a few 10 my. We give a start.
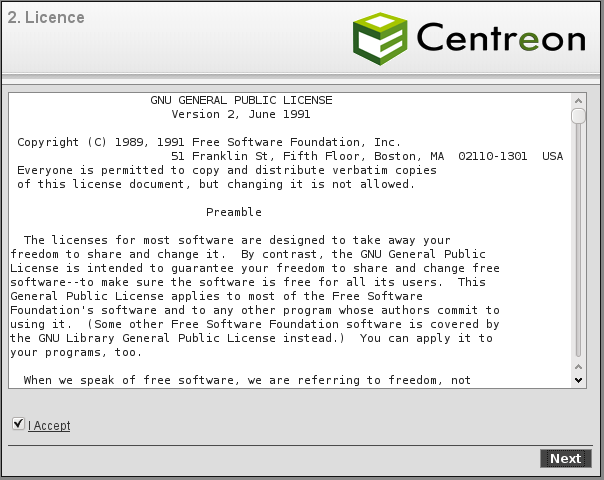
Accept the license and click Next.
In setting up the environment, leave everything default, nagios user, apache, etc. If we changed something we have to change. Next press.

Check the installation and see that we have every right. Next press.

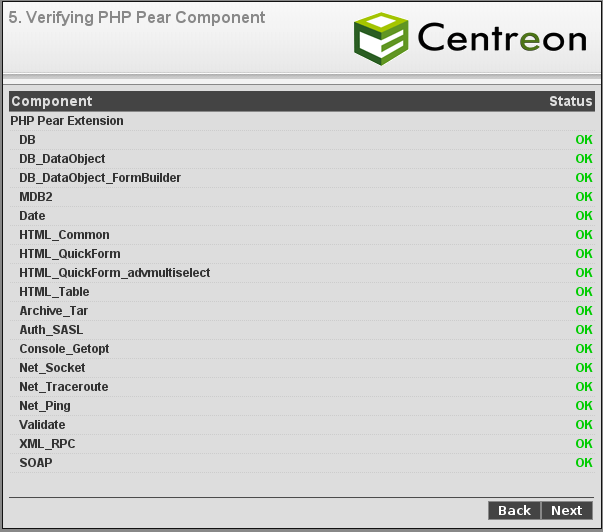
Check the PEAR modules. All right, Next press.
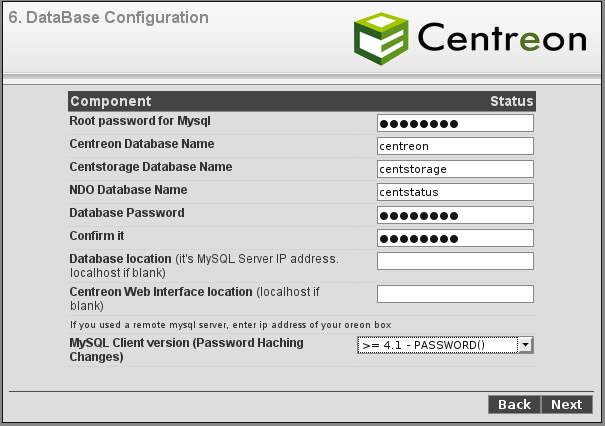
In creating database. We put the root password to enter when you install mysql mysql the beginning of the article. The names of the databases created Centreon, in particular three, let them default. Enter a password for the database to be create and confirm. Since we have installed mysql and web interface on the local computer Centreon, leave the fields blank and put the localhost address by default. If we were on another computer or server mysql web interface Centreon, would introduce here the corresponding IP addresses. Last, Mysql as we have more than 4.1, leave the last parameter of the function PASSWORD() and >=4.1… Next press.
Check the database. All right, Next press.

Configure the user interface. For that we created the user who will administer Centreon, password and data, Name, Surname and email. Next press.

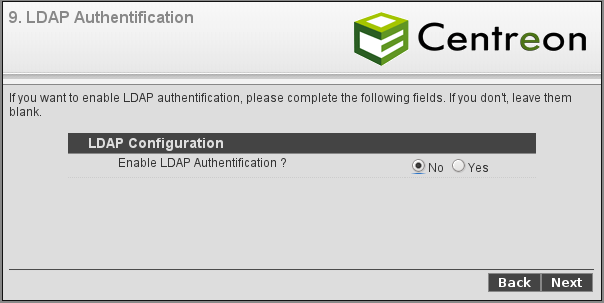
We asked if you want to use user authentication with LDAP. The default is no, which is what I choose as I have no LDAP, but you can click yes and I will fill in the necessary fields for configuring LDAP and Centreon. Next press.
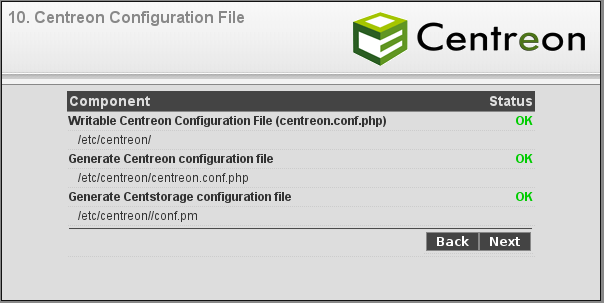
Verifies and creates configuration files Centreon. All ok, Next press.
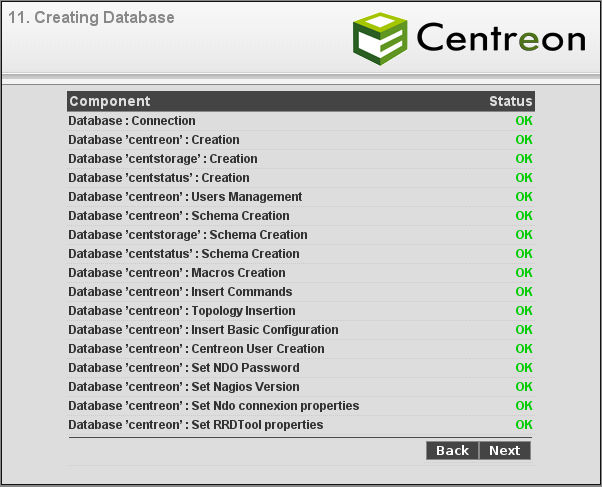
Create and verify the databases. All ok, Next press.
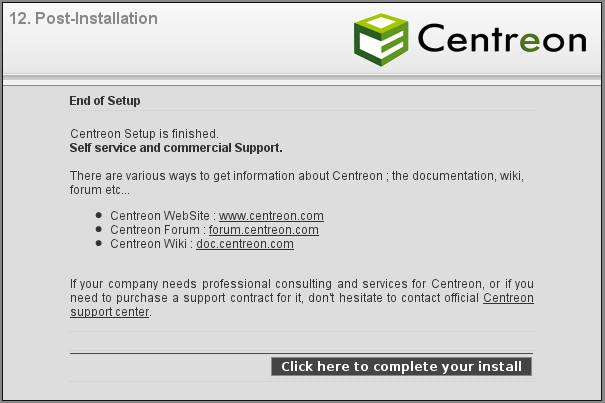
Last, tells us that we have completed the installation, some links to web Centreon where we can get information and other links where you can buy support. We can also buy additional plugins on your site. Pulsamos en Click here to complete your install.
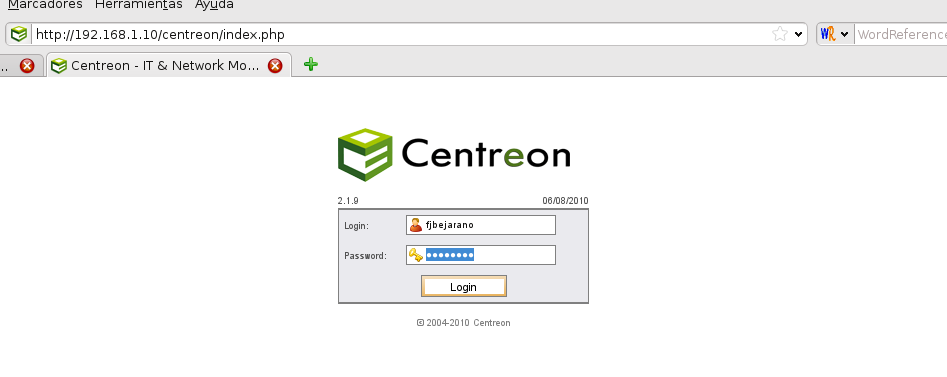
If all went well, lead us to the login page. Introducing our username and password that got in step 8 configuration user interface and enter to Centreon.
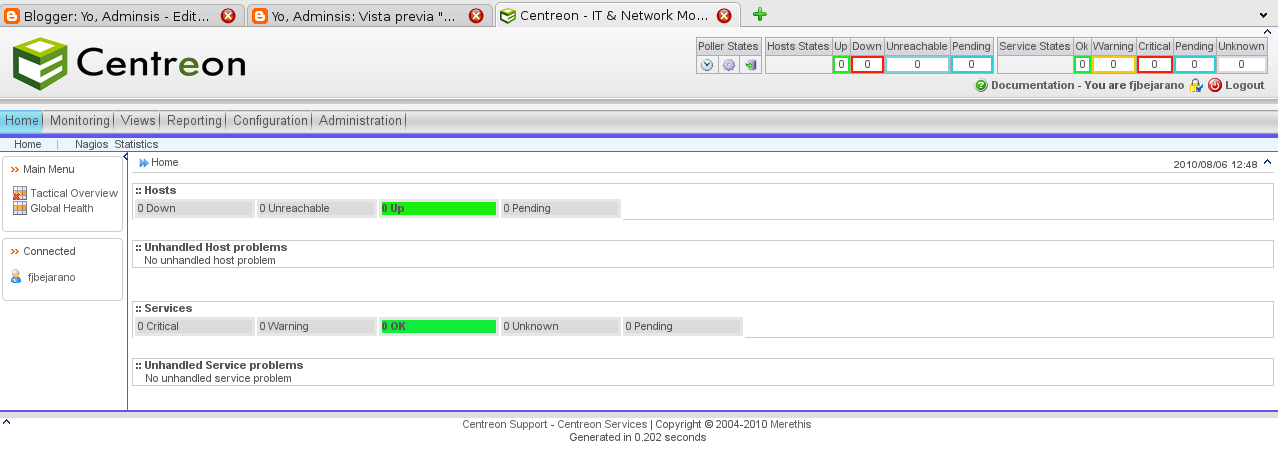
And ready, Centreon and have installed Nagios. Now we can configure Nagios from Centreon. You can test how it works
Import data from Nagios to Centreon. Explanation of configuration files.
To understand how Centreon and Nagios will, we must take into account the following:
1.- At first, Nagios files will, the settings in / usr / local / nagios / etc, services, hosts, etc.
2.- When first installed Centreon, import the files in / usr / local / nagios / etc to Centreon. After that initial import, do all the settings via the Web interface Centreon, not the Nagios files.
3.- When you change settings in Centreon, de hosts, services, nagios.cfg, etc, through the web interface, para que los cambios se reflejen en Nagios debemos Generar los ficheros y exportarlos a Nagios. This will generate the files nagios.cfg, service files, etc. new and changed in / usr / local / nagios / etc, therefore, and both applications will be synchronized.
To import Nagios config files to Centreon (Point 1) create an archive of all files. cfg / usr / local / nagios / etc / objects less commands.cfg. Copy it to the host to add it later, since we are in a virtual machine. We must put the notice commands.cfg commands in a file and check in another.
$ cd /usr/local/nagios/etc/objects
$ sudo mv commands.cfg ../
$ sudo tar -czf nagioscfgs.tgz *.cfg
$ scp nagioscfgs.tgz usuarioanfitrion@ipanfitrion:/home/usuarioanfitrion/
$ sudo touch checkcommands.cfg
$ sudo touch notifycommands.cfg
$ sudo chown www-data:www-data checkcommands.cfg notifycommands.cfg
$ sudo chmod 775 checkcommands.cfg notifycommands.cfg
$ cat commands.cfg
Commands.cfg show and copy commands to check and notify checkcommands.cfg in notifycommands.cfg
$ scp checkcommands.cfg usuarioanfitrion@ipanfitrion:/home/usuarioanfitrion/
$ scp notifycommands.cfg usuarioanfitrion@ipanfitrion:/home/usuarioanfitrion/
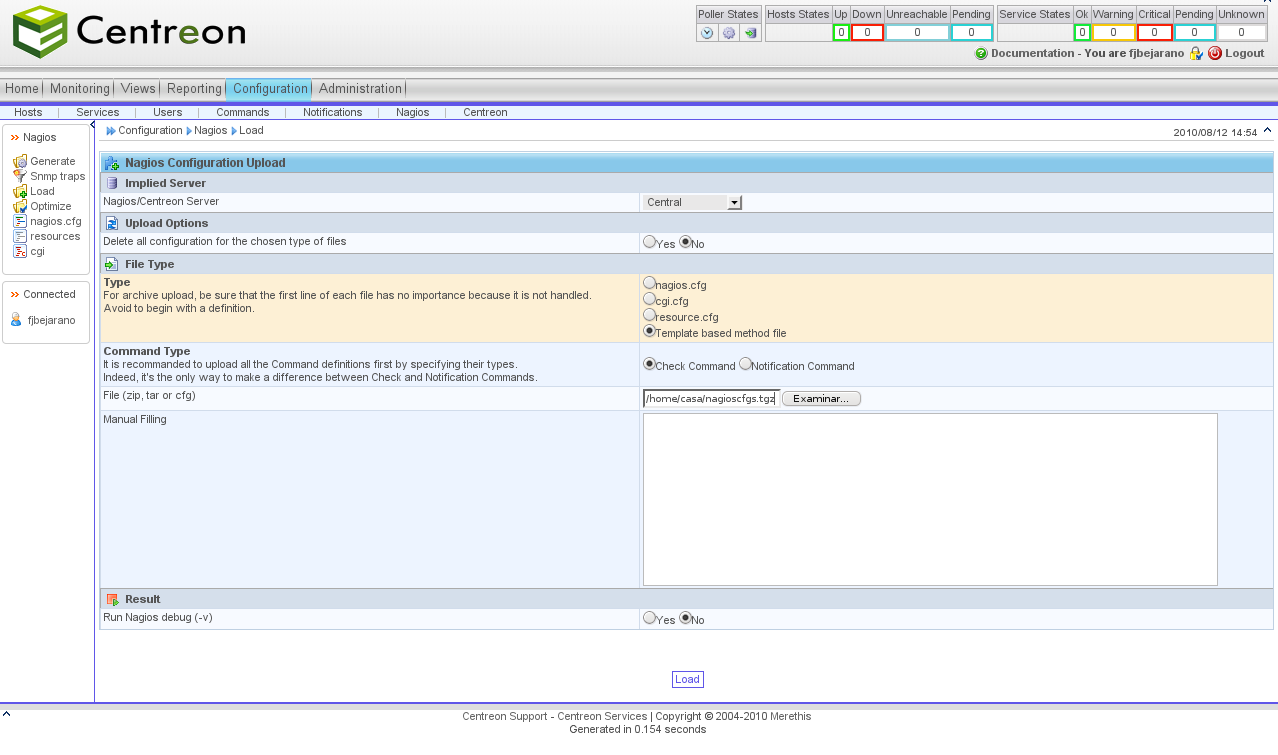
We enter the web interface with the user administrator Centreon. Press Setup on the Main Menu. In the submenu, just below the main menu by Nagios. In the left panel menu press Load.
Checkcommands.cfg loaded first, Select the Check Command, click Browse and select the file notifycommands.cfg same but selecting Command Notification.
After the above, choose the file we created earlier (nagioscfgs.tgz) Browse in the central panel and click Load in the central panel.
Once this is done, as we have changed the configuration of Centreon we will generate the configuration files and export to Nagios. From here and just configure with Centreon, never in the files of Nagios.
We're going to Settings->Nagios, panel izquierdo Generate. In the central panel we give no option Export Export Move Files. So only check for errors with a simulation of the creation of files. Once we see that no errors (if the correct), we check the option Move Files and Restart Nagios Export and Export, and give to already have created the new configuration files.
NOTE: Error Ndoutils:
[08-12-2010 13:00:41] ndomod: Still unable to connect to data sink. 757 items lost, 5000 queued items to flush.
If we see the previous error in the logs is usually because ndomod.o not communicating well with the daemon ndo2db. This may be because the socket is misconfigured configuration files in / usr / local / nagios / etc / ndomod.cfg and / usr/local/nagios/etc/ndo2db.cfg. In Centreon recommended the use of tcp socket unix not. I updated the part of NDOutils to correct the problem and to use tcp sockets. Until we correct the problem will not store data in mysql. When Nagios and ndoutils reboot should see the following, that states have been reported correctly.
[08-12-2010 13:00:58] Event broker module '/usr/local/nagios/bin/ndomod.o' initialized successfully.
[08-12-2010 13:00:58] ndomod: Successfully flushed 5000 queued items to data sink.
[08-12-2010 13:00:57] ndomod: Successfully connected to data sink. 5000 queued items to flush.
[08-12-2010 13:00:57] ndomod: NDOMOD 1.4b9 (10-27-2009) Copyright (c) 2009 Nagios Core Development Team and Community Contributors
Source: http://yoadminsis.blogspot.com/2010/08/centreon-219-y-nagios-321-en-ubuntu.html
Later on each machine to monitor follow these steps
http://www.linuxparatodos.net/portal/staticpages/index.php?page=como-linux-snmp
http://rm-rf.es/como-instalar-y-configurar-snmp/